
This is the final post in my series on how to use WordPress to design your own website. The series will focus on business websites, but the principles are the same for personal ones as well. Now, we’ll look at how to install and activate WordPress plugins.
WordPress comes as a fully functioning program. But one of its best features is its scalability. You can expand on WordPress’ functionality as your needs become more advanced. How can you do this easily and efficiently? By installing the best WordPress plugins.
In this post, we’ll look at the best WordPress plugins that will immediately improve the usefulness and efficiency of your website. We’ll also see how to download them to your WordPress environment.
WordPress has two versions: the web-based WordPress.com and the self-hosted WordPress.com.
I explain the primary differences in my previous posts, but in a nutshell, with the web-based version, your website is hosted on WordPress’ servers and you create your website by logging in to your WordPress account on your browser. This version comes with some plugins, but in order to add your own plugins, you must subscribe to the business plan.
With the self-hosted version, you house your your website on your own server or on one that you have a subscription with. This is a much more flexible version and enables you to add as many plugins as you need.
What Are Plugins?
Plugins are programs, written in the same language as WordPress itself (PHP), that increase the functionality of WordPress. As of this writing, there are over 55,800 plugins that will work with WordPress. They make it easy to accomplish important tasks such as helping your site get indexed by the Google search engine, helping you improve your SEO, tracking your site’s Google Analytics, and protecting your blog posts from spam.
These days, it would be hard to come up with a function you would need to add to your site that couldn’t be accomplished with the right plug-in.
Best WordPress Plugins to Get Started
Following are my top five recommendations for the WordPress plugins that you really need to get started with your website. The basic versions of all five are FREE.
1. 
UpdraftPlus makes backing up your website to the cloud a breeze! It’s easy to install and set up and you have the option of doing a manual backup or an automatic one with the frequency of your choice. If you do a lot of work on your website daily, you may set UpdraftPlus to back up daily. If you work on it less frequently, you can set the backups to occur weekly or even monthly.
UpdraftPlus is one of the top WordPress plugins, with over a million active installs. You can back up all of your site’s files, including the WordPress database (the text of your blog posts and web pages), uploads (photos and videos), and your plugins and themes.
You can set UpdraftPlus to back your files up to your own hard drive or to the cloud, such as to Dropbox, Google Drive, or Amazon S3. You can even have it email you the backup files, all with the free version. The paid version adds Microsoft OneDrive, Azure, and Backblaze B2 to the mix.
2. 
Yoast SEO is one the most popular plugins in use today. It will help you attract more visitors to your website by ensuring that you use keyword phrases correctly, write an appropriate meta description for your page, and write your posts in a way that’s attractive to your readers.
You can select a keyword phrase and Yoast SEO will check everything from your meta description to your main content to make sure you are all set for optimizing your post or page for SEO purposes.
3. 
If you are a business that plans to sell products online, the Woocommerce plugin is indispensable. This plugin will help you create a professional looking and flexible catalog for your e-commerce store. You can include photos, descriptions, multiple pricing categories, tax information and shipping options.
The plugin has been downloaded over 56 million times and powers over 28 percent of online stores, so using Woocommerce for your e-commerce needs would put you in good company.
4. 
There are many options a available for tracking your Google Analytics for your website, but Google Analytics Dashboard, by ExactMetrics, is the one I recommend. It allows you easily enter your Google tracking number and then see an informative overview of your website’s visitors, page-views, and session counts directly on your site’s WordPress dashboard.
But you can also view more advanced segmented data for both your pages and posts.
5. 
I like the expanded functionality of WordPress’ Visual Editor that TinyMCE enables. You can add buttons to more easily configure font sizes, font families, font color, background colors, table insertion, etc. The standard editor only allows for basic functions such as heading or paragraph, bold, and italic.
I also like being able to keep the paragraph tags in the text editor and to be able to import CSS classes from the theme’s editor-style.css.
How to Install WordPress Plugins
You can easily install plugins in one of two ways: By logging into your website’s WordPress.org account and searching the database of plugins or by downloading plugins directly from the producer’s website and then uploading them to your website.
Installing Directly from the WordPress Plugin Database
The most straightforward way is to log in to your website’s WordPress.org account and simply clicking on “Plugins” of the left-hand menu.
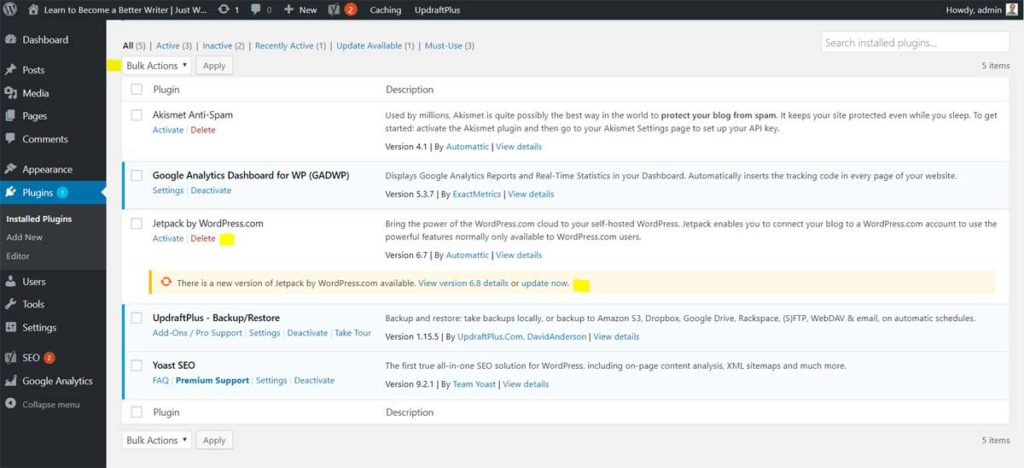
The first window, “Installed Plugins,” will show you the ones already installed for your site. Here, you can either activate or deactivate the ones you want / don’t want to use. If you are positive you no longer want a plugin, you can also delete it entirely.
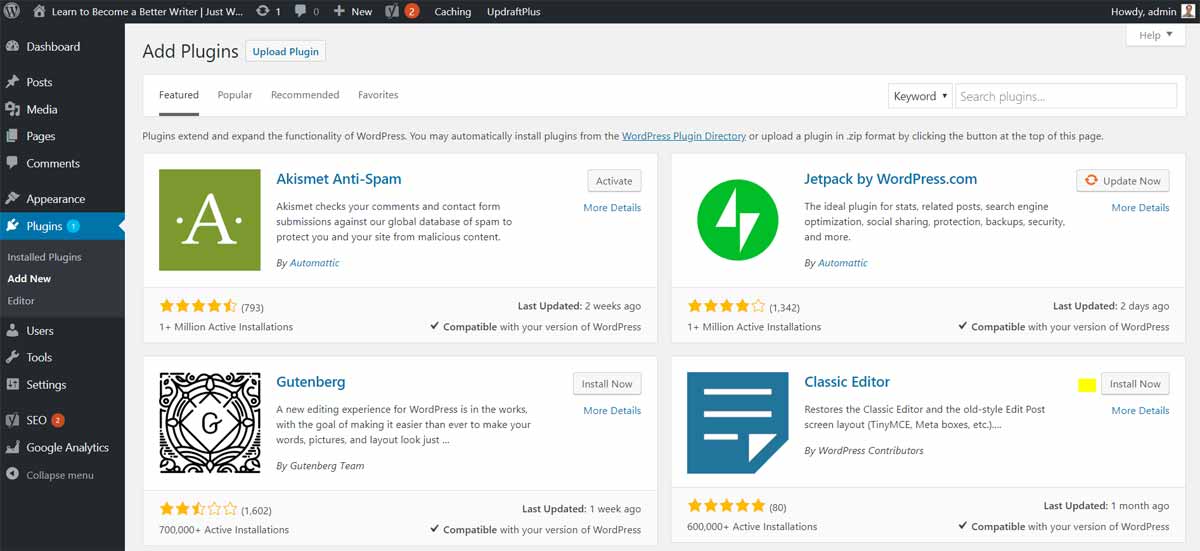
To download a new plug in, click on the “Add New” tab under the Plugins menu. This will take you to the screen where you can view the most popular plugins and install the ones you want.
However, you may find it more efficient to search for the plugins you need by keyword, author, or tag. You can just leave the “keyword” option selected and search either by name if you have it or by what you want to do. For example, if you enter “seo” into the search field, all the plugins related to SEO will be shown.
Alternatively, if you just want to check out which WordPress plugins are available without even needing to be signed in to your WordPress account, you can navigate to WordPress’ page specifically for plugins.
Notice also that when plugins need to be updated, you will receive a notice under the plugin’s name informing you of the update. For both functionality and security purposes, you should always keep your plugins updated. Not doing so can lead to some serious issues with other components of your site. It’s usually a temporary situation, however, and updating the plugin will almost always fix the issue.

By the way, the third option on the left-hand menu under “Plugins” is the plugin editor. This allows you to change the PHP and CSS code that drives the plugin. I don’t recommend that you do this. Making an unintended change in this code can serious affect your plugin’s functionality and may even break it entirely.
In fact, if you click on “Editor,” you will get a warning message advising you not to make any changes to these files. This is for expert users only.
After you download the plugin, it will appear on your list of “Installed Plugins.”

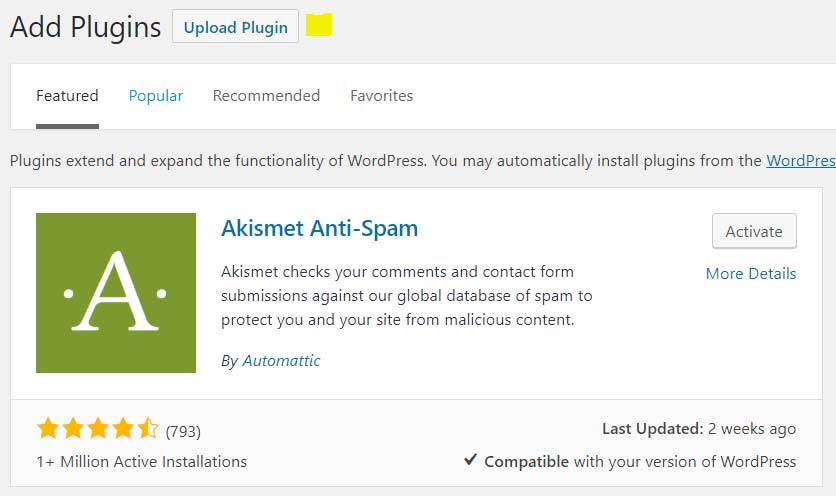
There’s one more step in the process. After you install your plugin, you have to activate it. Just click the “Activate” button in the upper-right part of the plugin’s tab.
Some plugins also enable you to change settings. This step should not be overlooked, as in order to get the most benefit from the plugin, the settings need to be correct. To change the settings, just go back to Plugins –> Installed Plugins from the left-hand menu. You will see two options under the name of the plugin in the list, “deactivate” and “settings.” Click “settings” and change them according to your needs.
Please remember that the developer of your free plugins does not get paid by WordPress, or anyone else for that matter, so if you find a plugin useful, consider making a small donation. It helps them lot.
Installing a Downloaded “Premium” Plugin
By far and large, you should be able to find a plugin to suit your needs that’s free or asks for a small donation. However, there may be times when you require a very specialized plugin. This is known as a “premium” theme, meaning the developer charges for it.
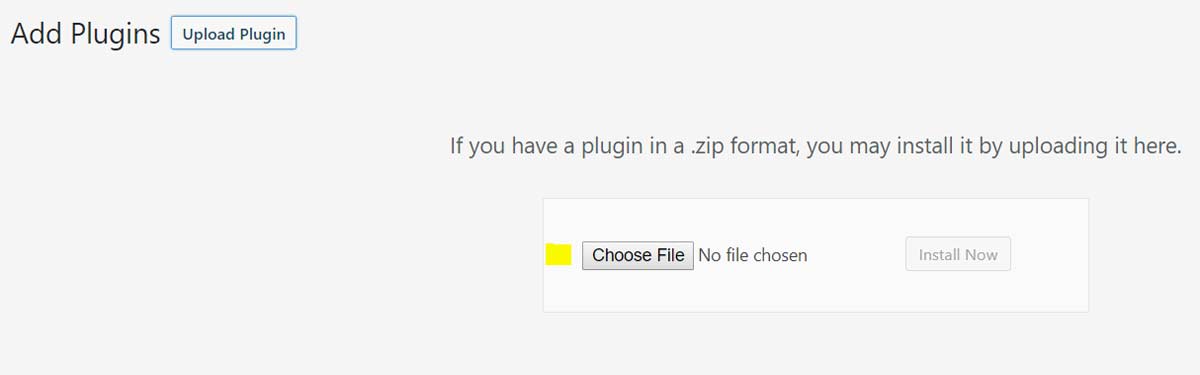
It’s still a pretty straightforward process to install a premium theme. Be sure that you click on the “Add New” link under the “Plugins” menu on the left. Then, on the top-left part of the screen that opens, just to the right of the “Add Plugins” label, there is an “Upload Plugin” button.
Just click that button and the screen that opens will allow you to choose a plugin file to upload.
IMPORTANT: You will need to upload the compressed version (.zip) of the file, just as it comes downloaded to your hard drive. Be sure to not “unzip” the file. It won’t work if you do. Just leave the file in the compressed version and upload that file to your WordPress.
After you upload the file and install it. Be sure to activate it and check the settings, changing them if necessary to suit your needs.
And that’s it! You will soon discover that the wonderful word of WordPress plugins will enable you to expand your website’s functionality and appearance in ways that would be quite challenging and time consuming without them.