This is the first post in a series on how to use the self-hosted version of WordPress to design your own website. The series will focus on business websites, but the principles are the same for personal ones as well. Let’s start by learning how to download and install WordPress onto your server.
What is Self-Hosted WordPress?
The self-hosted version of WordPress houses your website on your own server, either at your company, or one that you subscribe to. You download the free software from WordPress and then install it plus additional plugins and themes per your needs. It’s really a straightforward process and the one that I recommend over the web-based version of WordPress.
How is This Version Different from the Wed-Based Version?
This post, and the following related ones, focuses on the WordPress.org self-hosted version. If you are interested in the web-based WordPress.com version, please see my post on that version. Just a few of the key differences in benefits between the two WordPress versions are the use of plugins, installation of themes, and monetizing potential of your website.
Plugins
Plugins are small applications that you download and install on top of your basic WordPress software. These add incredible functionality to your website’s design and performance. Plugins are easily found by searching within the plugin page of your WordPress design application.
Plugins are an essential part of enjoying the total freedom to build your WordPress website exactly as you want it. With the proper plugins, you can do almost anything you may need or want to do with your website. With the self-hosted version (WordPress.org), you enjoy this total freedom to install and use plugins as you want.
The web-based version of WordPress comes with a basic set of plugins, even with the free plan. However, you must upgrade to the business plan to be able to be able to install additional plugins.
Installation of Themes
With WordPress.com, you will have access to some free themes even with the free plan. Upgrading to the premium or business plans will give you access to even more. But, you are still limited to what this version offers and there is no option to upload additional themes purchased off the WordPress platform.
With WordPress.org, you have total freedom to choose whichever WordPress theme you wish. This is a much more flexible option. This allows you to install and use the excellent Divi theme, which is a great one to use to design an attractive and professional looking website.
Monetizing Your Website
One of the key benefits of having a blog is being able to make extra money — if blogging isn’t already your main source of income — through affiliate marketing and direct advertising. Affiliate marketing is when you use a special link within your blog posts, or image links in your sidebar, that directs a visitor to your site to your affiliate’s site, where a purchase is offered. If that reader makes a purchase, you get a commission for referring that customer.
Direct advertising is placing an ad created by your client, or by an ad agency, in the sidebar or within the post itself, that directs your visitors to the advertiser’s sales page. Some small or medium-sized business websites earn their owners thousands or tens of thousands (some even more) of dollars a month through affiliate marketing and direct advertising. Both are legitimate practices and are perfectly legal.
But you can only take advantage of this on WordPress.com with the Business plan. This will cost you US$300 per year. Not a lot, really, but with your self-hosted option, you’re looking at less than $75 for the hosting fees, and that’s with the plus plan.
The additional cost of the WordPress.com option does not make this version very preferable over the WordPress.org version.
So, if you choose to go with the more flexible, less expensive version, let’s look at how to get you set up.
How To Download and Install WordPress
The following are the steps to take to set up your self-hosted WordPress website.
Get a Web Host
Before you can install the WordPress self-hosted version, you will need to get a web host. This is the service you use to provide a home for all the files on your website. It is also through your host that you can register for your domain name.
I know this may seem like a lot if you are new to this, but we will look at each step carefully as we go through this WordPress tutorial. Really, after you get a host and download WordPress, much of the operation after that is very similar to the web-based version described above.
The reason I recommend the self-hosted version over the web-based one is that the self-hosted option gives you more control over your website.
The host that I use and recommend is Bluehost, which is very highly used by both individuals and businesses to host their websites. I have been with Bluehost since 2011 and have been quite happy with their product and service. Here are the steps to get started:
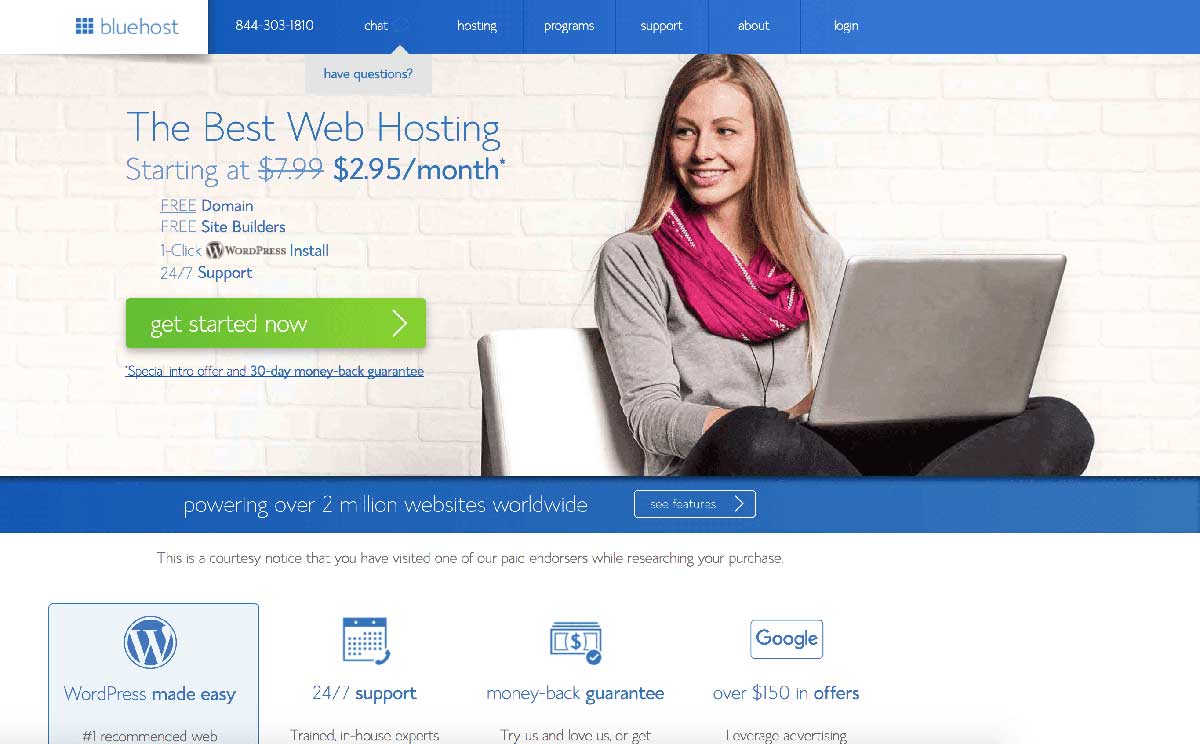
1.Go to the Bluehost website.
2. Click on the green “Get Started Now” button.
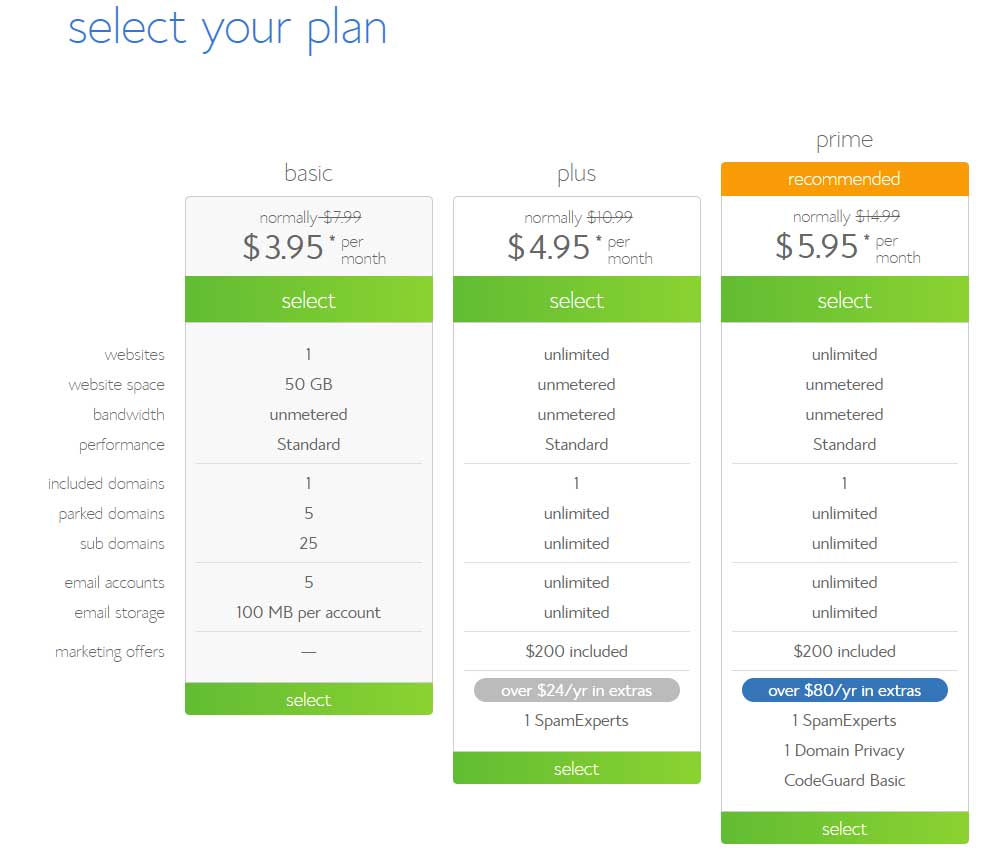
3.Select a plan according to your needs — basic, plus, or prime. The difference in price is minimal but the offerings in the plus or prime plan are huge.
4. After you click “select,” the next page will allow you to register a domain name. This is a very important step, as it will become your “web address,” or URL. So, choose carefully. If you need some tips on choosing a domain name, one of the foremost authorities on search-engine optimization has provided some for you.
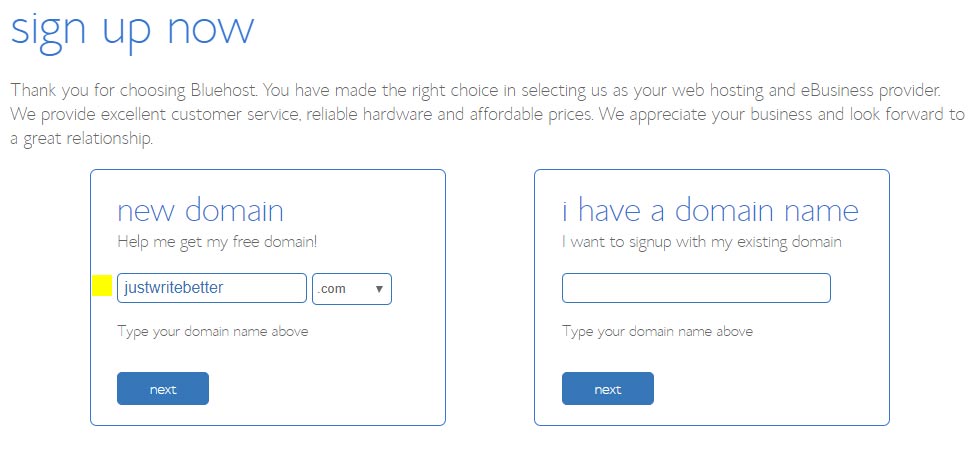
Always try to get a “.com” URL (Uniform Resource Locator, your “web address”). This is the most traditional and your readers will expect to see a .com URL for a business website.
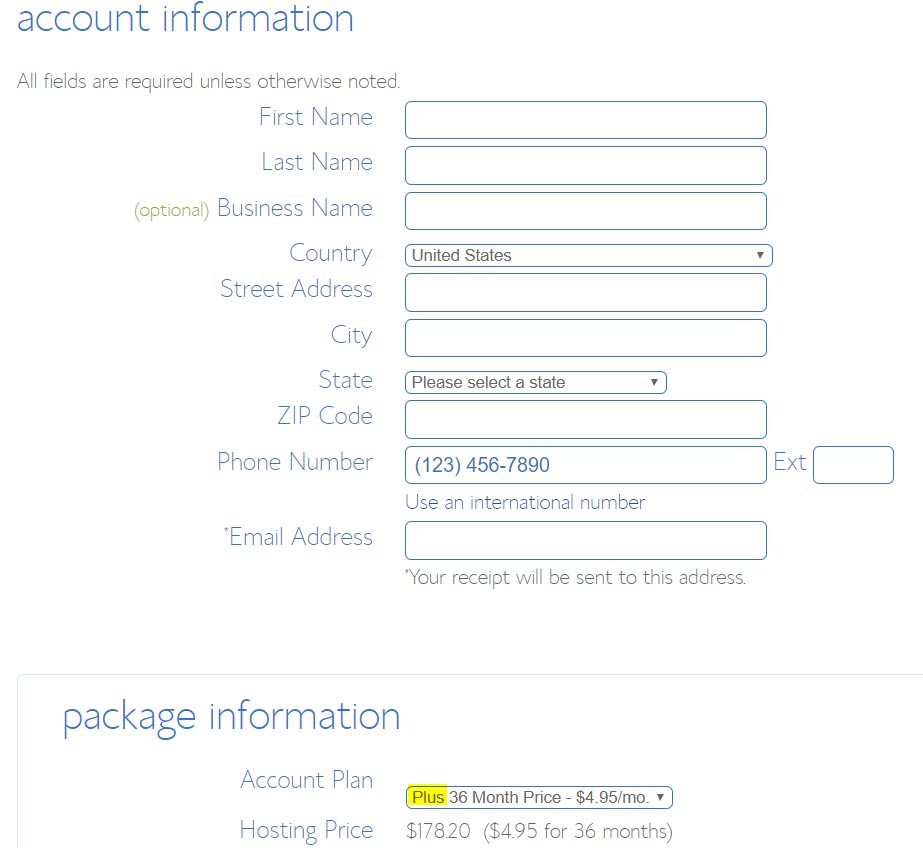
5. On the next screen, enter your account information. At the bottom, you will be asked to enter your payment information. After you complete this step, you have set up your new hosting account!
Install WordPress on Your Domain
Now that you have your hosting account set up, it’s time to download WordPress! If you are using Bluehost, you can use their WordPress installation tool to do this for you. This is a huge convenience and will make your life easier.
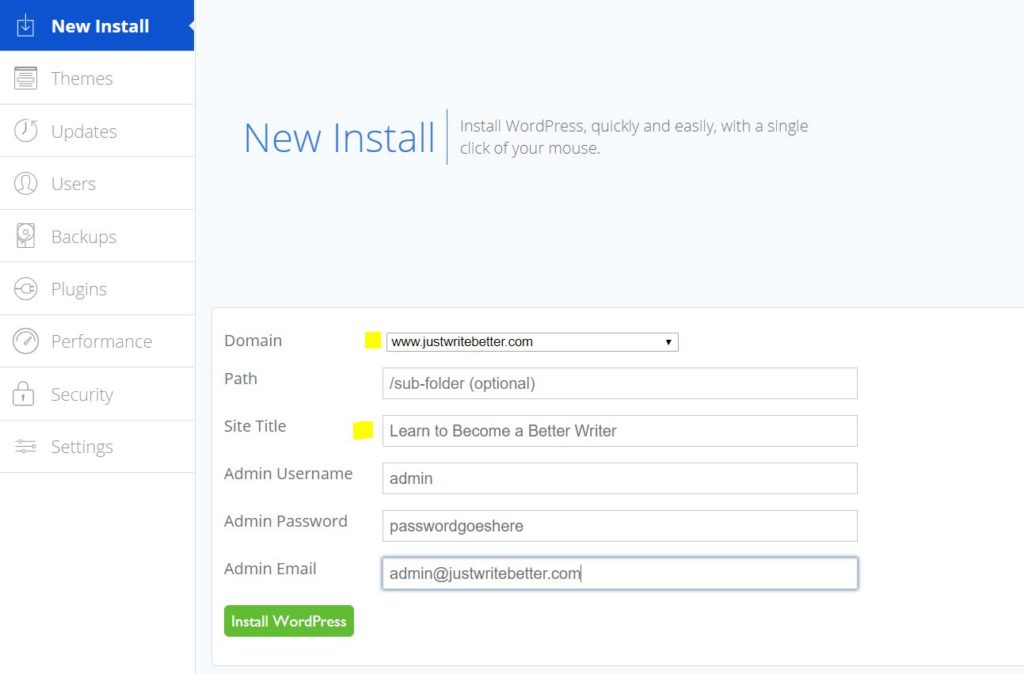
From the WordPress tools screen, make sure you click on the New Install tab all the way to the upper left. If you already have another domain name on your server, be super sure to select the correct domain, as you see above. You will be given a choice between having the “www” as part of your URL, such as http://www.greensagemedia.com, or without it, such as http://greensagemedia.com.
I have done a lot of reading up on which option is better and have tried both options. I prefer including the “www,” as that is the traditional form of a URL and is what users are used to. However, I have yet to discover a major advantage of one over the other.
For most installations, and especially if this is your first domain name on your server, there is no need to fill in a path name. The installer will create its own path. However, you should fill in the site title, briefly indicating what your business does. This “tagline” will appear in your homepage’s tab at the very top of your visitor’s browser.
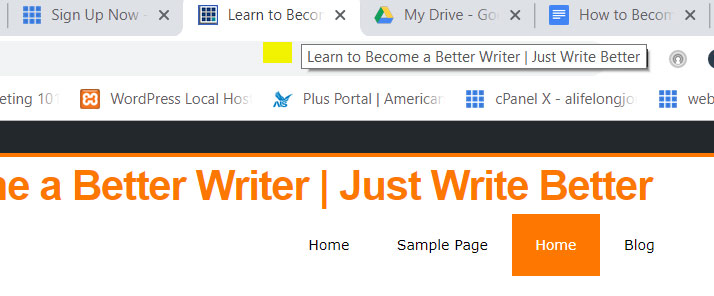
For example, if you hover your mouse over the tab at the top of your own browser for a few seconds right now, you will see a small pullout that says “Green Sage Media | Professional Digital Marketing and Web Design Services.” This is important for SEO purposes as well as for indicating to your reader what your website is about. You can always easily change your tagline on the WordPress settings page.
After all of your information in filled in, click “Install WordPress” and wait a few minutes for the installation to complete. Be patient and don’t refresh the page or close your browser at this point.
When installation is complete, there are no trumpets or confetti telling you installation was complete. Rather, the spinning “pending” notification stops and the installer goes on to the “Updates” page and tells you that WordPress is up to date.
Now for the exciting part! You can check to see if the installation was successful by simply typing your URL into a new tab on your browser. You should see a simple website showing your tagline.
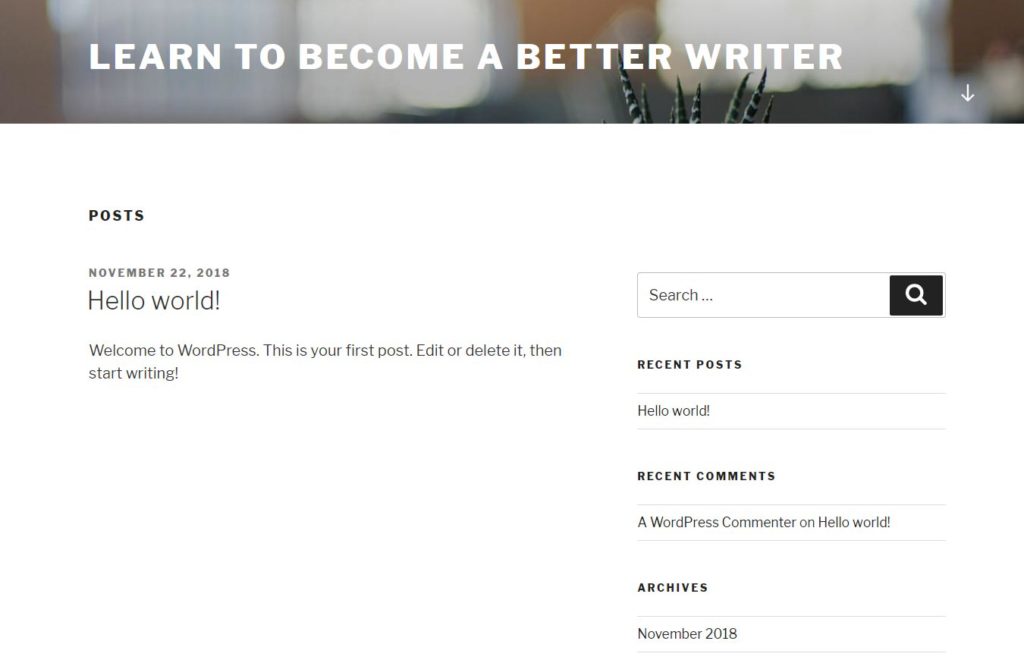
If you see this page (or something similar), you have successfully installed WordPress. Congrats! And don’t worry. This page is just a placeholder for now, showing that at least you have a website getting ready to undergo its designing.
In my next posts in this series, we’ll learn how to conduct a basic WordPress setup, install plugins and themes, and design a basic website.
By the way, if you are using a host that does not offer the WordPress automatic install explained in this post, don’t despair. It’s not very difficult to download and install WordPress manually. It just takes a little more time and effort on your part. But, these days, most of the more popular hosts offer the automatic WordPress installation option.